
Importing Existing Entry Locations
Introduction
Gravity Search stores location records for the fields selected under Entry Geocoding. Searches use those records for proximity filtering, distance calculations, distance sorting, and map markers.
After Entry Geocoding is configured, new and updated entries are synchronized automatically. The Import Existing Entry Locations tool backfills location records for active entries that already existed before the current settings were saved.
The importer processes each selected field separately. One entry can therefore create more than one location record when multiple fields are selected under Fields to Geocode.
When Import Is Needed
Run the importer when:
- You enable Entry Geocoding on a Target Form that already contains entries.
- You import entries into Gravity Forms from another site or file.
- You add a new field to Fields to Geocode and need location records for older entries.
- Existing entries are missing from proximity results or map markers because their location records have not been created.
- You need to retry locations that were skipped or failed during an earlier import.
Entries submitted or updated after Entry Geocoding is configured are synchronized automatically. You normally use this importer for existing entries or for a deliberate retry.
Configure Entry Geocoding
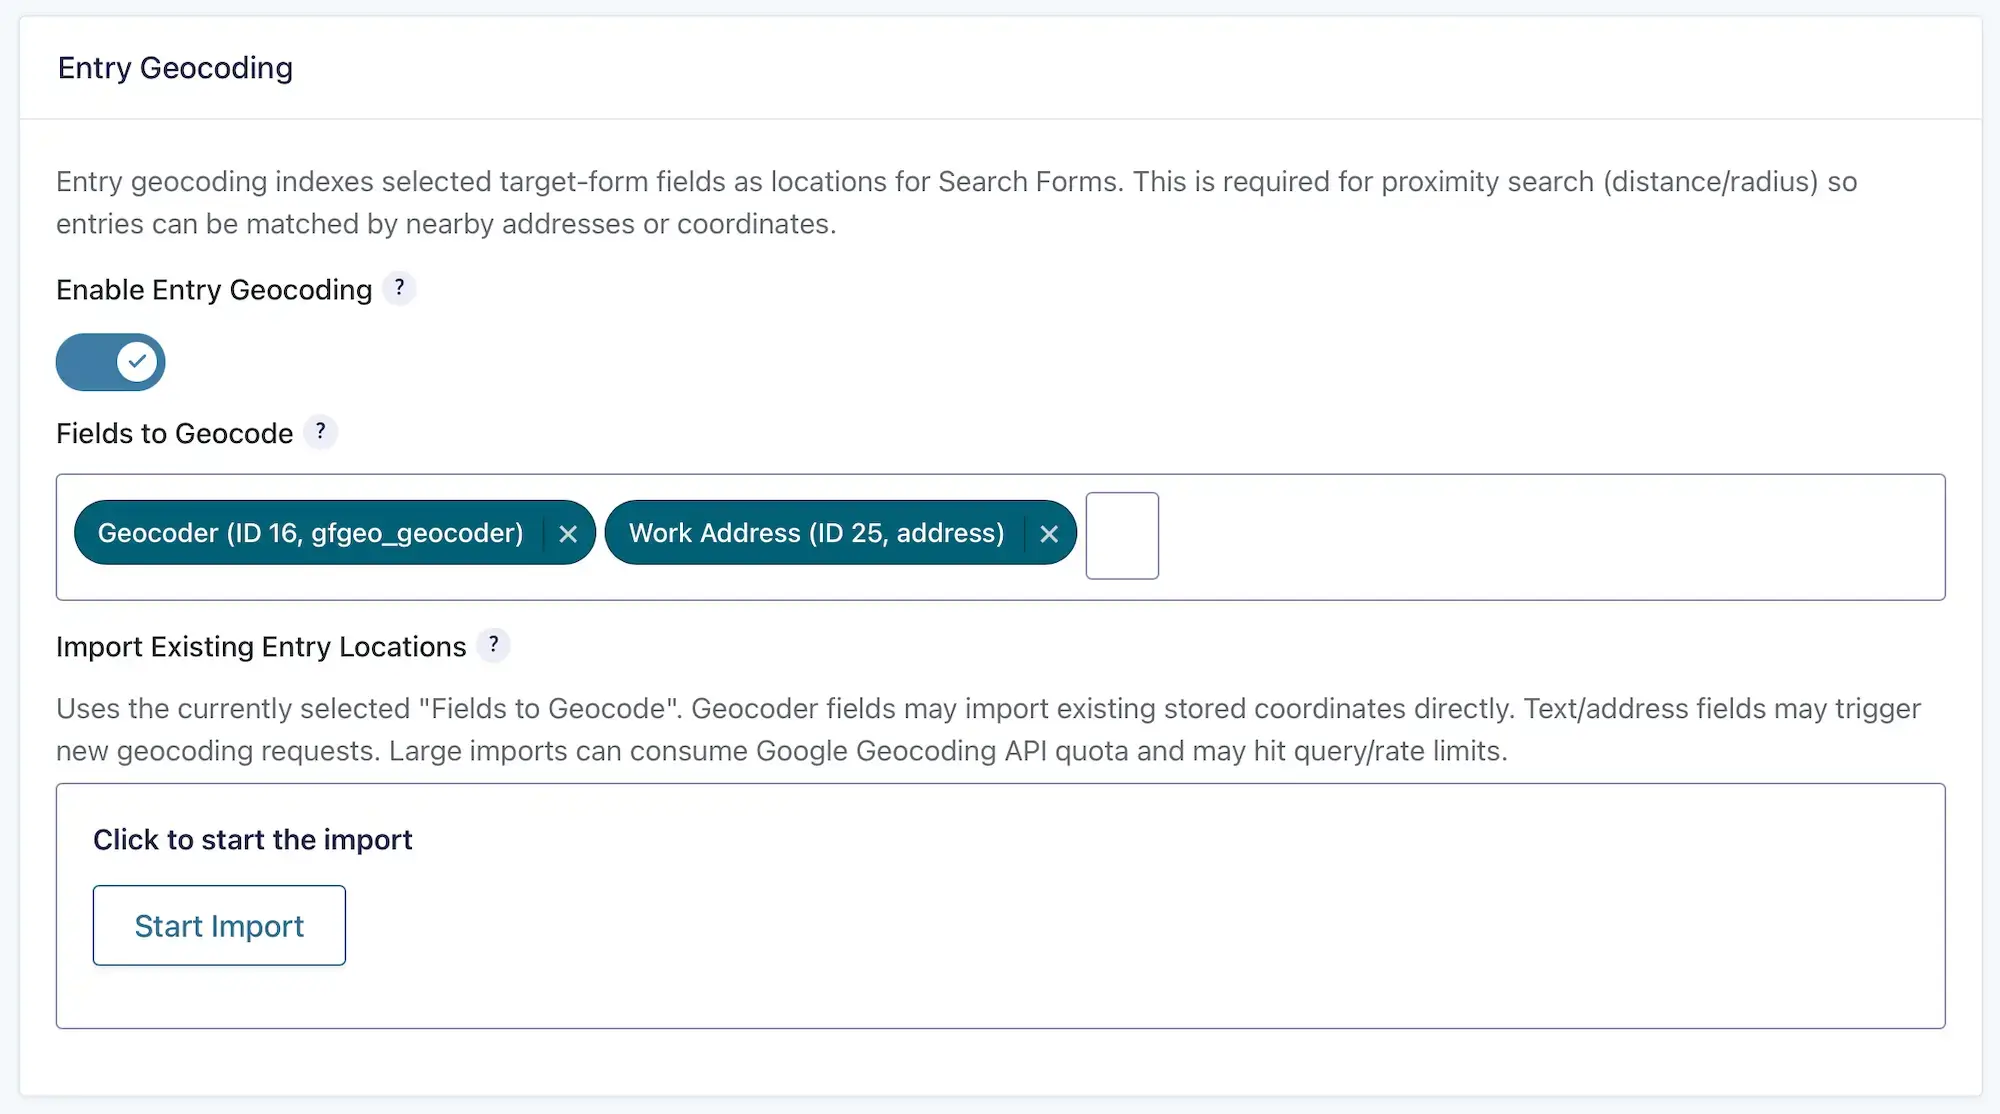
Open the Target Form settings and locate the Entry Geocoding section. Enable Enable Entry Geocoding, then select one or more location fields under Fields to Geocode.
Supported source fields are:
- Geocoder fields: The importer can use the location payload and coordinates already stored by the field.
- Address fields: The importer combines the saved address components. If coordinates are not already available, the address must be geocoded during import.
- Single Line Text fields: The saved value is treated as an address and may need to be geocoded.
- Paragraph Text fields: The saved value is treated as an address and may need to be geocoded.
Save the Target Form settings before starting the importer. The importer uses the saved Fields to Geocode selection, and the interface warns you if that selection contains unsaved changes.
Choose an Import Mode
The importer includes a Geocode locations missing coordinates checkbox. It is enabled by default for each new import run.
Geocode Missing Coordinates
Leave the checkbox selected when entries may contain an address but no latitude and longitude. The importer uses existing valid coordinates when available and sends address-only locations to the configured geocoding provider.
Each geocoding request may count against your API quota and may incur provider charges. Review your server-side Google Maps API key, Geocoding API access, billing, restrictions, and quota before processing a large number of address or text values.
Import Existing Coordinates Only
Clear the checkbox to avoid new geocoding requests. In this mode, locations that already contain valid coordinates can be imported, while address-only locations are skipped. This is useful when you want a coordinate-only import or need to control API usage.
Before You Begin
- Enable Enable Entry Geocoding.
- Select the required Fields to Geocode.
- Save the Target Form settings.
- Choose whether the importer may geocode locations that are missing coordinates.
- If geocoding is enabled, confirm that the Google Maps server API key and required geocoding service are configured correctly.
The importer scans active entries only. Trashed or spam entries are not included in the import total.
Run the Importer
- Open the Target Form settings and find Import Existing Entry Locations.
- Confirm the Geocode locations missing coordinates checkbox is set for the import you want to run.
- Click Start Import.
- Keep the page open while the importer processes entries in batches.
- Review the progress bar, counters, and Processed Locations table until the status reports Import completed.
Use Cancel to stop the current run. You can start another run later; locations whose saved address already matches an existing location record are skipped rather than duplicated.
Understanding Import Results
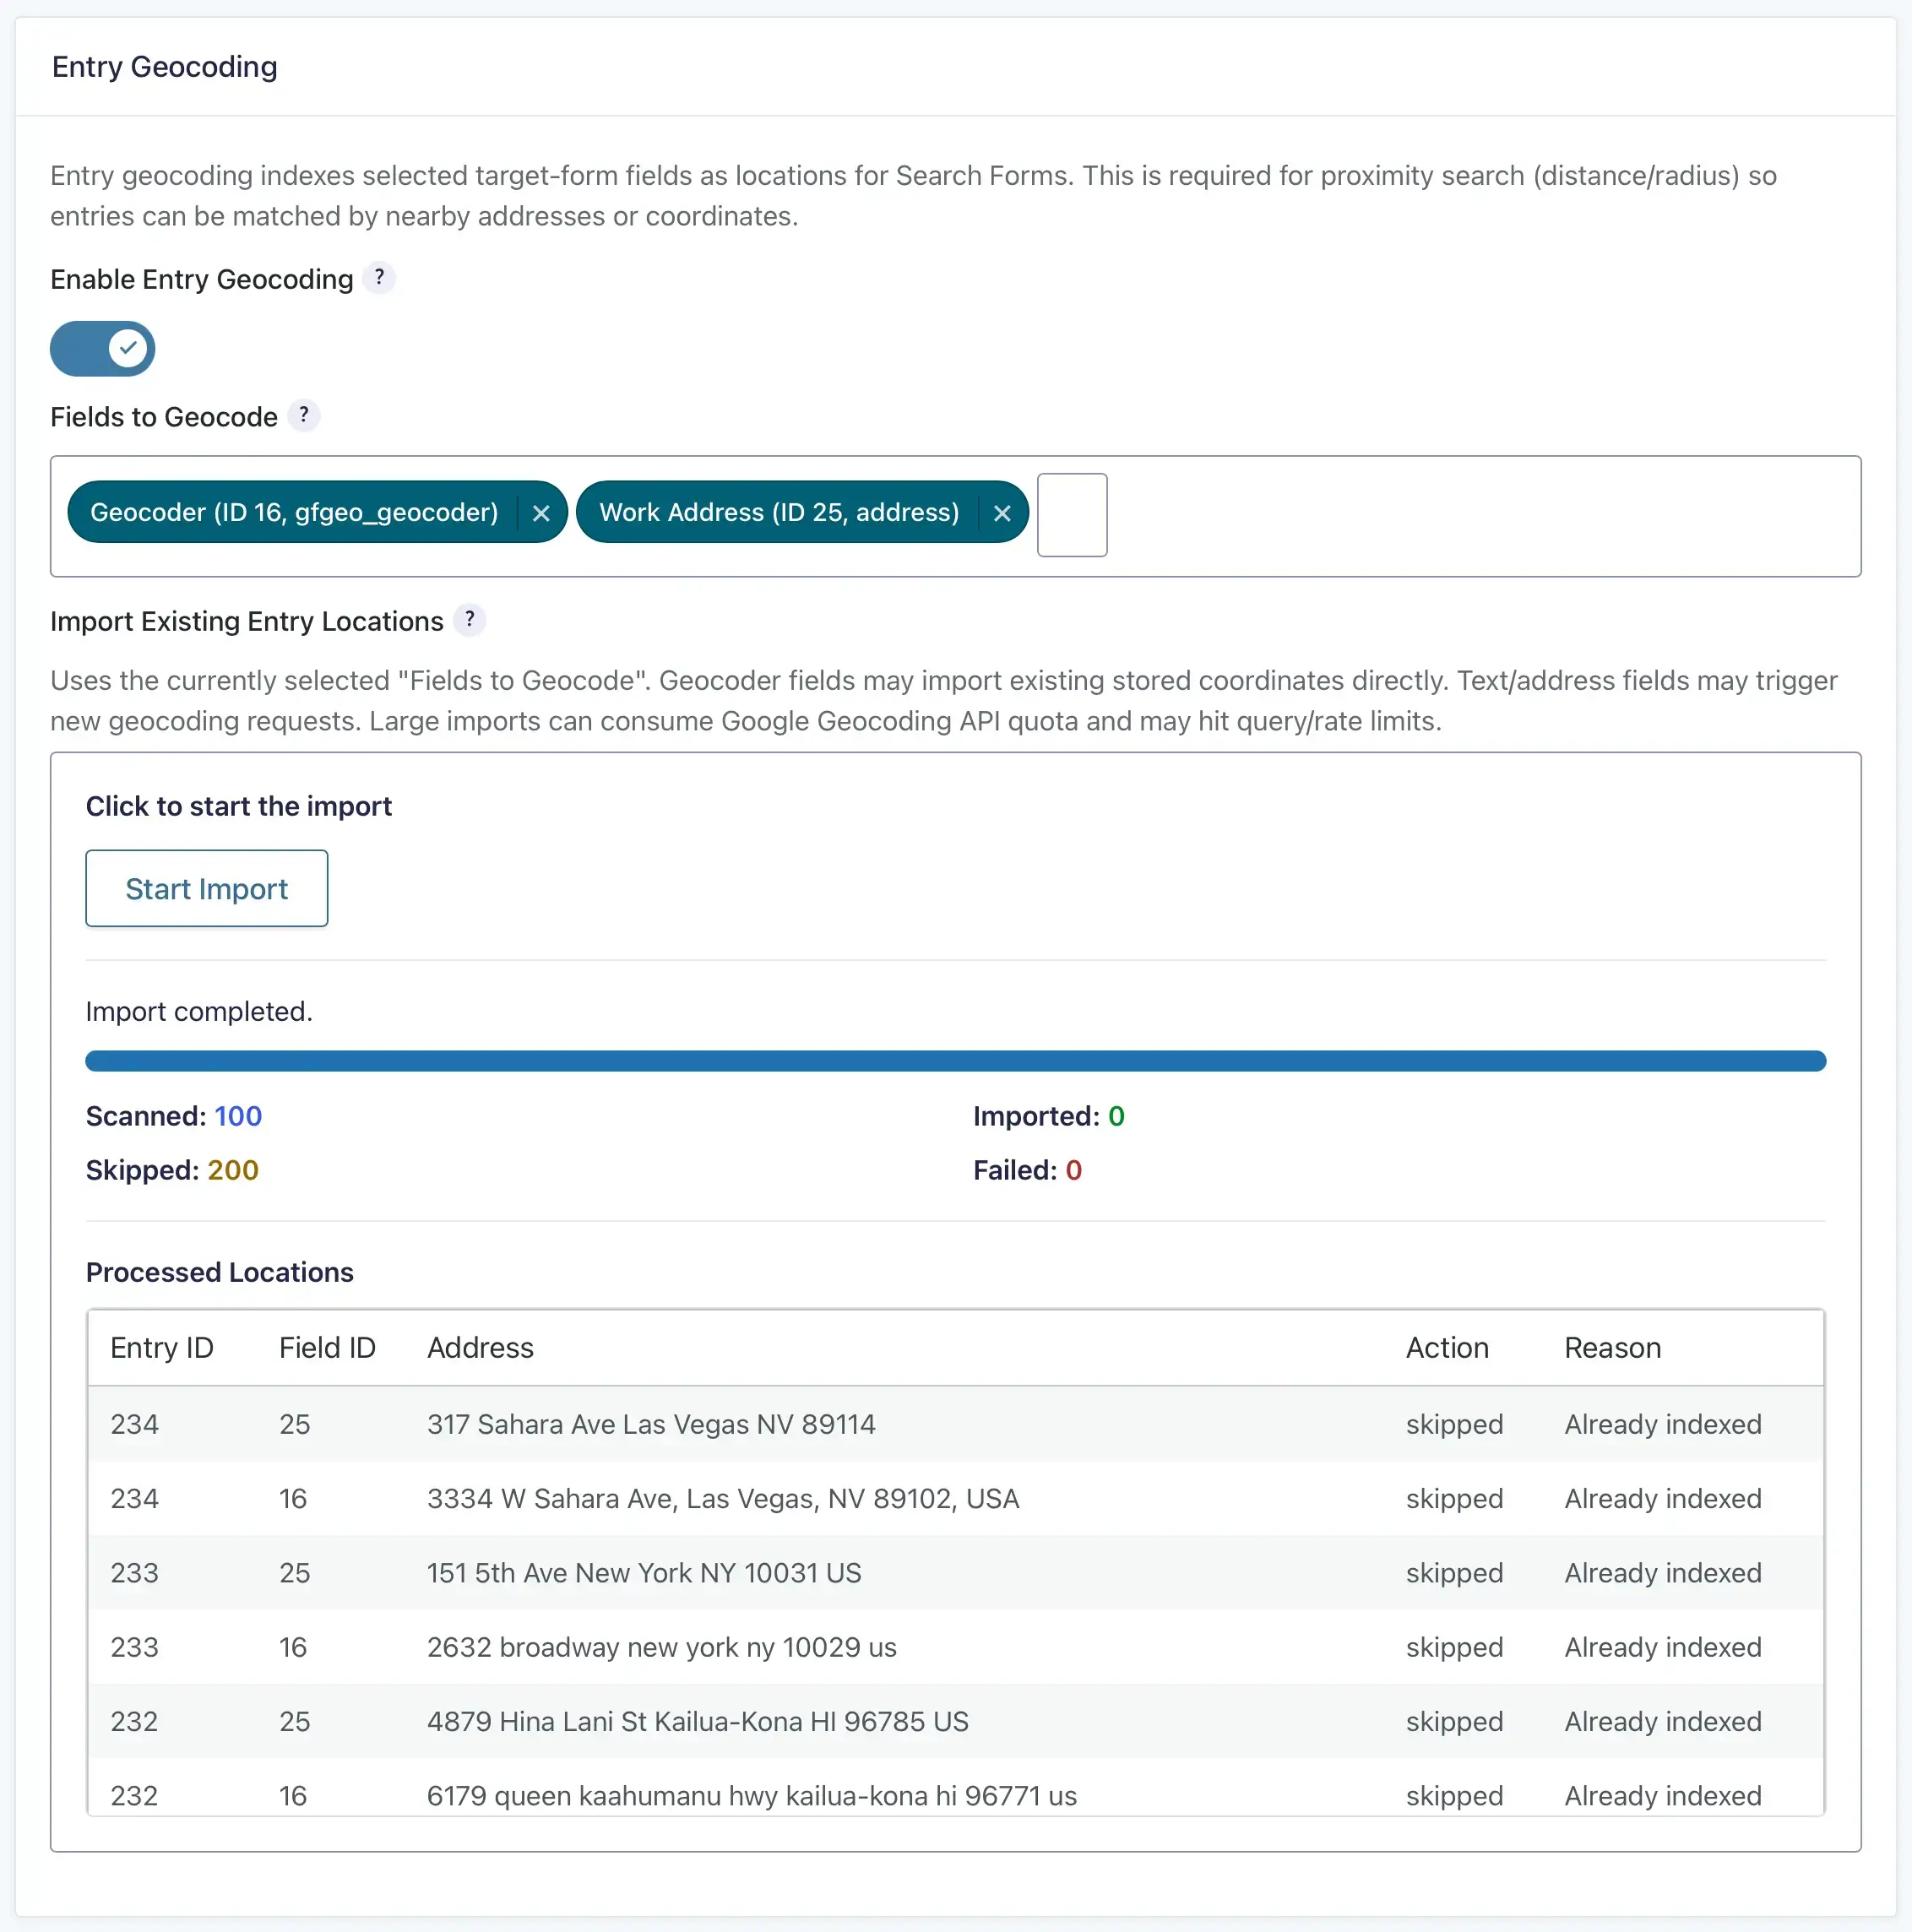
The progress panel displays four counters:
- Scanned: Active Gravity Forms entries examined.
- Imported: Selected field locations saved with valid coordinates, either from existing coordinates or successful geocoding.
- Skipped: Locations not imported because the field was empty, the same location already existed, or geocoding was disabled for an address without coordinates.
- Failed: Locations that could not be geocoded, validated, or saved.
The Processed Locations table lists the Entry ID, Field ID, address, action, and reason for each recent location attempt. Because one entry can have several selected fields, the Imported, Skipped, and Failed totals can be greater than the Scanned entry count.
A skipped result is often expected and does not necessarily indicate an error. Review failed rows and their reasons before testing the Search.
After Importing
Open the Search that uses this Target Form and go to Search Setup. Under Location Data Scope, select the location source fields the Search should use. Selecting a source makes its existing location records eligible for that Search; it does not create missing records by itself.
Save the Search, review Search Readiness for configuration warnings, and test the relevant features:
- Submit an address and radius in the location search field.
- Confirm expected nearby results and distances.
- Confirm distance sorting when enabled.
- Confirm the expected result markers appear on the map.
- If multiple location fields are selected, confirm the Search uses the intended source or sources.

Historical Location Records
Removing a field from Fields to Geocode stops future automatic synchronization for that field, but it does not delete location records that were already stored. Those records remain available as historical locations.
Use Location Data Scope to decide whether a Search can use current sources, historical sources, or both. The importer works from the fields currently selected under Fields to Geocode; it does not remove older location records from fields that are no longer selected.