
Distance & Duration Field
Introduction
The Distance & Duration Field in Gravity Geolocation calculates the distance and estimated travel time between two locations in a Gravity Form. It works with two Geocoder Fields: one provides the origin and the other provides the destination.
The field can calculate a road-based journey with the Google Routes API or a straight-line distance using the Haversine method. The result is saved with the Gravity Forms entry and can be displayed in entry details, exports, notifications, confirmations, or supported Gravity Forms fields.
Unlike the Directions Field, the Distance & Duration Field does not draw a route, use waypoints, or provide step-by-step directions. Use it when you need the distance and duration data without displaying a complete route.
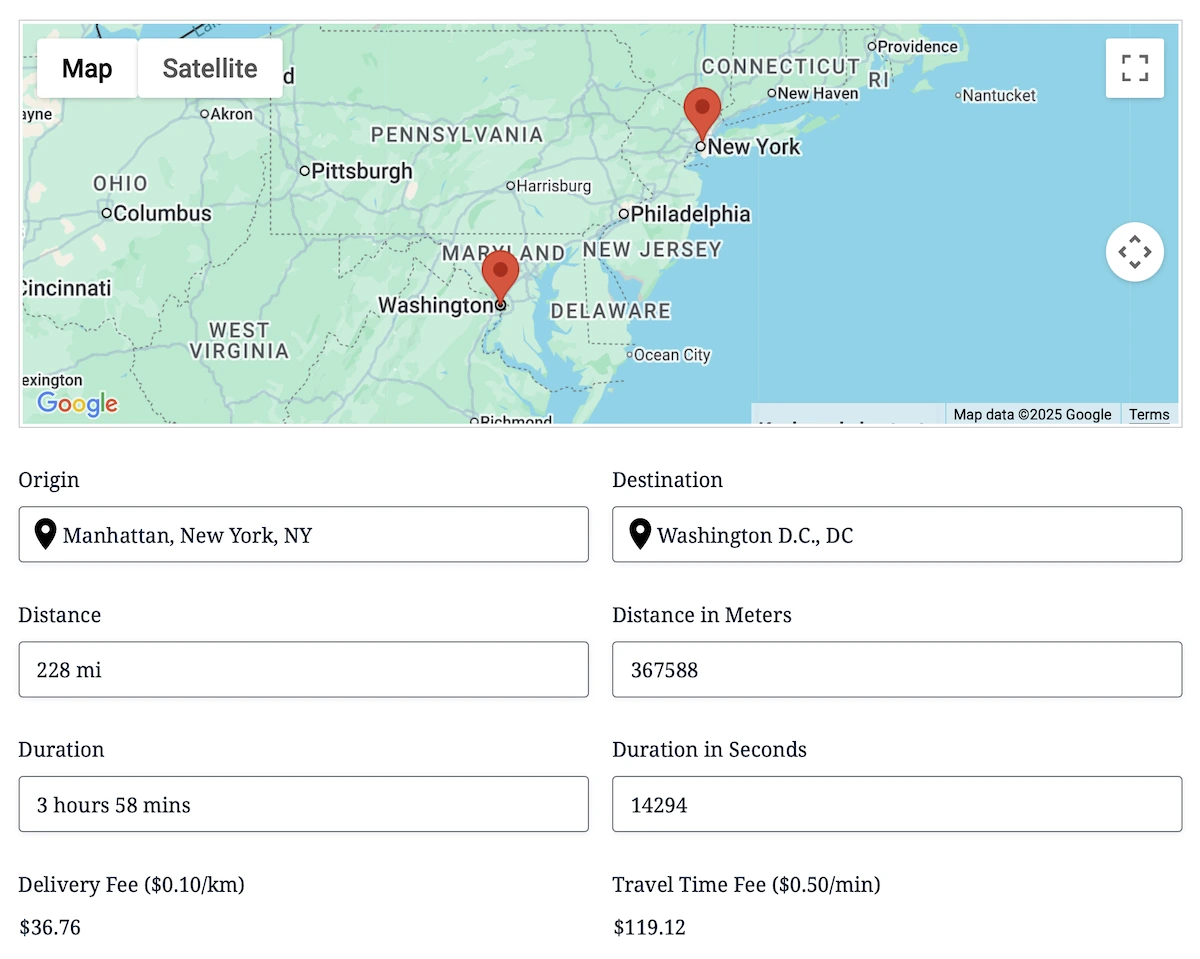
Display the calculated travel distance and duration between two locations.
Requirements
- Add two Geocoder Fields to the form and configure each one with a location source, such as an Address Field or Coordinates Field.
- Configure the Google Maps browser API key in the Gravity Geolocation settings.
- Enable the Google Routes API when using the Google Routes API distance method.
The calculation begins only after both linked Geocoder Fields contain valid coordinates.
Configuring the Distance & Duration Field
Add the field from the Geolocation Fields group in the Gravity Forms editor, then configure the following settings.
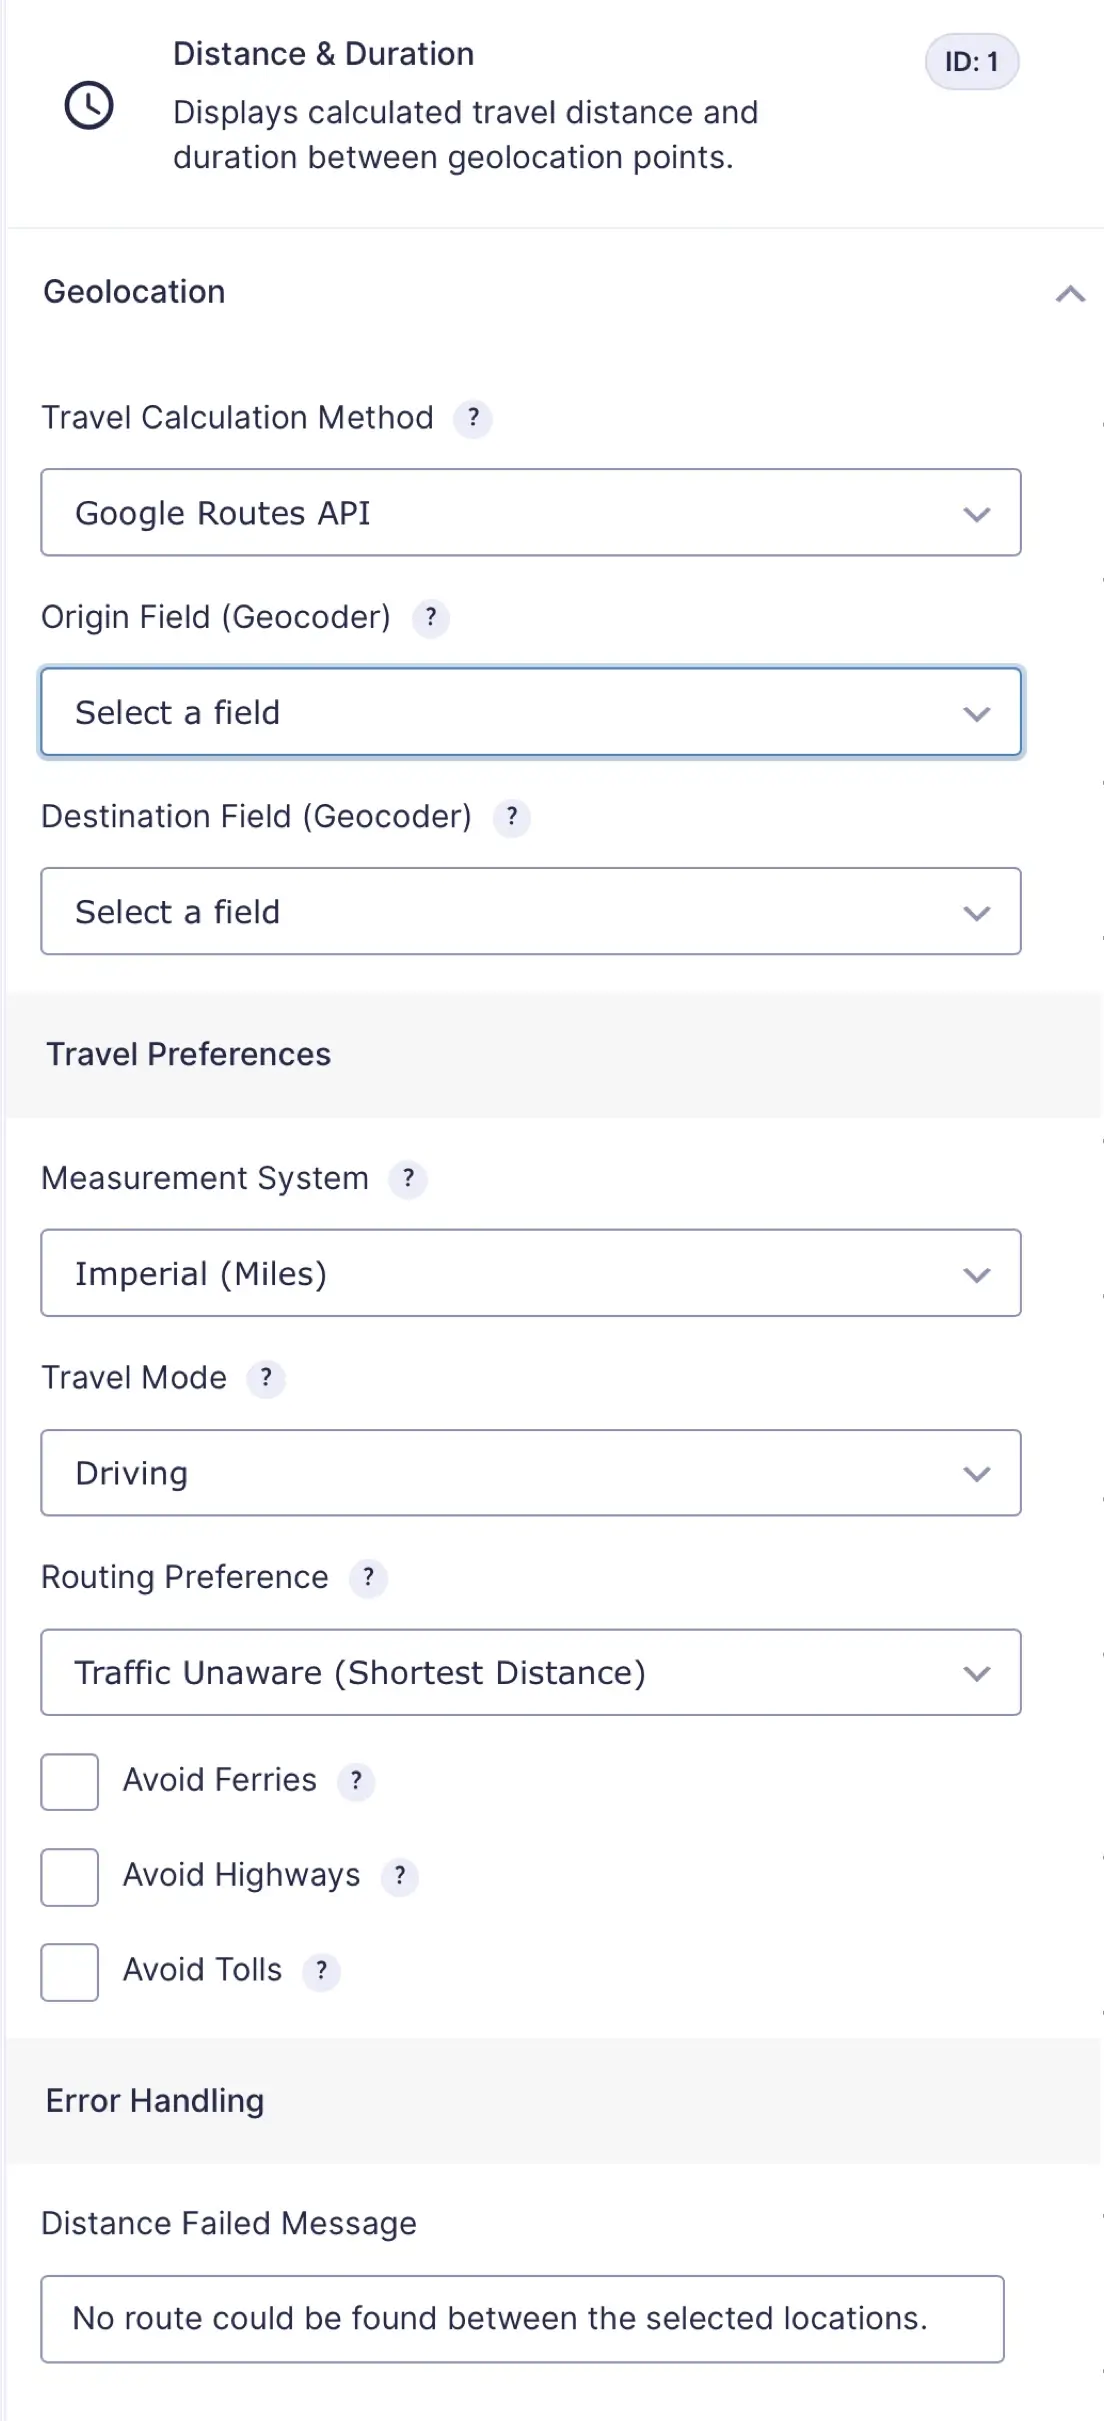
Configure the origin, destination, measurement system, travel mode, and routing preferences.
How the Calculation Works
- A location is selected or generated for each linked Geocoder Field.
- Once both locations contain valid coordinates, Gravity Geolocation automatically calculates the distance and duration.
- The complete result is saved in the hidden Distance & Duration Field.
- If either linked location changes, the field recalculates and saves the updated result.
The Distance & Duration Field itself is hidden on the front end because it acts as a calculation and storage field. To show a specific value to the user, populate a supported Gravity Forms field with the calculated data as described below.
Using the Calculated Data
Entry details and exports
The Gravity Forms entry detail page displays the saved distance, duration, origin, and destination. CSV exports use a readable distance and duration summary by default.
Populate another Gravity Forms field
Use a supported Gravity Forms field as a Dynamic Geolocation Field, select Distance Field as its usage, and link it to this Distance & Duration Field. You can populate any of the following values:
- Distance text.
- Distance numeric value.
- Distance value in meters.
- Duration text.
- Duration value in seconds.
For example, populate a Gravity Forms Number Field with a numeric distance value and then use Gravity Forms' calculation settings to calculate a delivery fee. The Distance & Duration Field stores the travel result, but it is not itself a native Gravity Forms calculation field.
Merge tags
Use the field's Gravity Forms merge tag in confirmations and notifications. The field supports these output modifiers:
.html: formatted HTML output (Default)..text: a plain-text distance and duration summary..distance: the human-readable distance..duration: the human-readable duration..json: the complete result as JSON..rawor.serialized: serialized result data for advanced integrations.
Add the modifier to the field ID portion of the merge tag. For example, if the field ID is 8, use {Distance & Duration:8.distance} for the distance text or {Distance & Duration:8.duration} for the duration text.
Setup Example
To calculate the driving distance between a pickup address and a delivery address:
- Add two Address Fields and two Geocoder Fields to the form.
- Link the first Geocoder Field to the pickup address and the second Geocoder Field to the delivery address.
- Add a Distance & Duration Field.
- Select the pickup Geocoder as the origin and the delivery Geocoder as the destination.
- Keep Google Routes API, Imperial, and Driving selected, or adjust them for your workflow.
- Preview the form, select both addresses, and submit a test entry.
- Open the entry and confirm that the distance, duration, origin, and destination were saved.