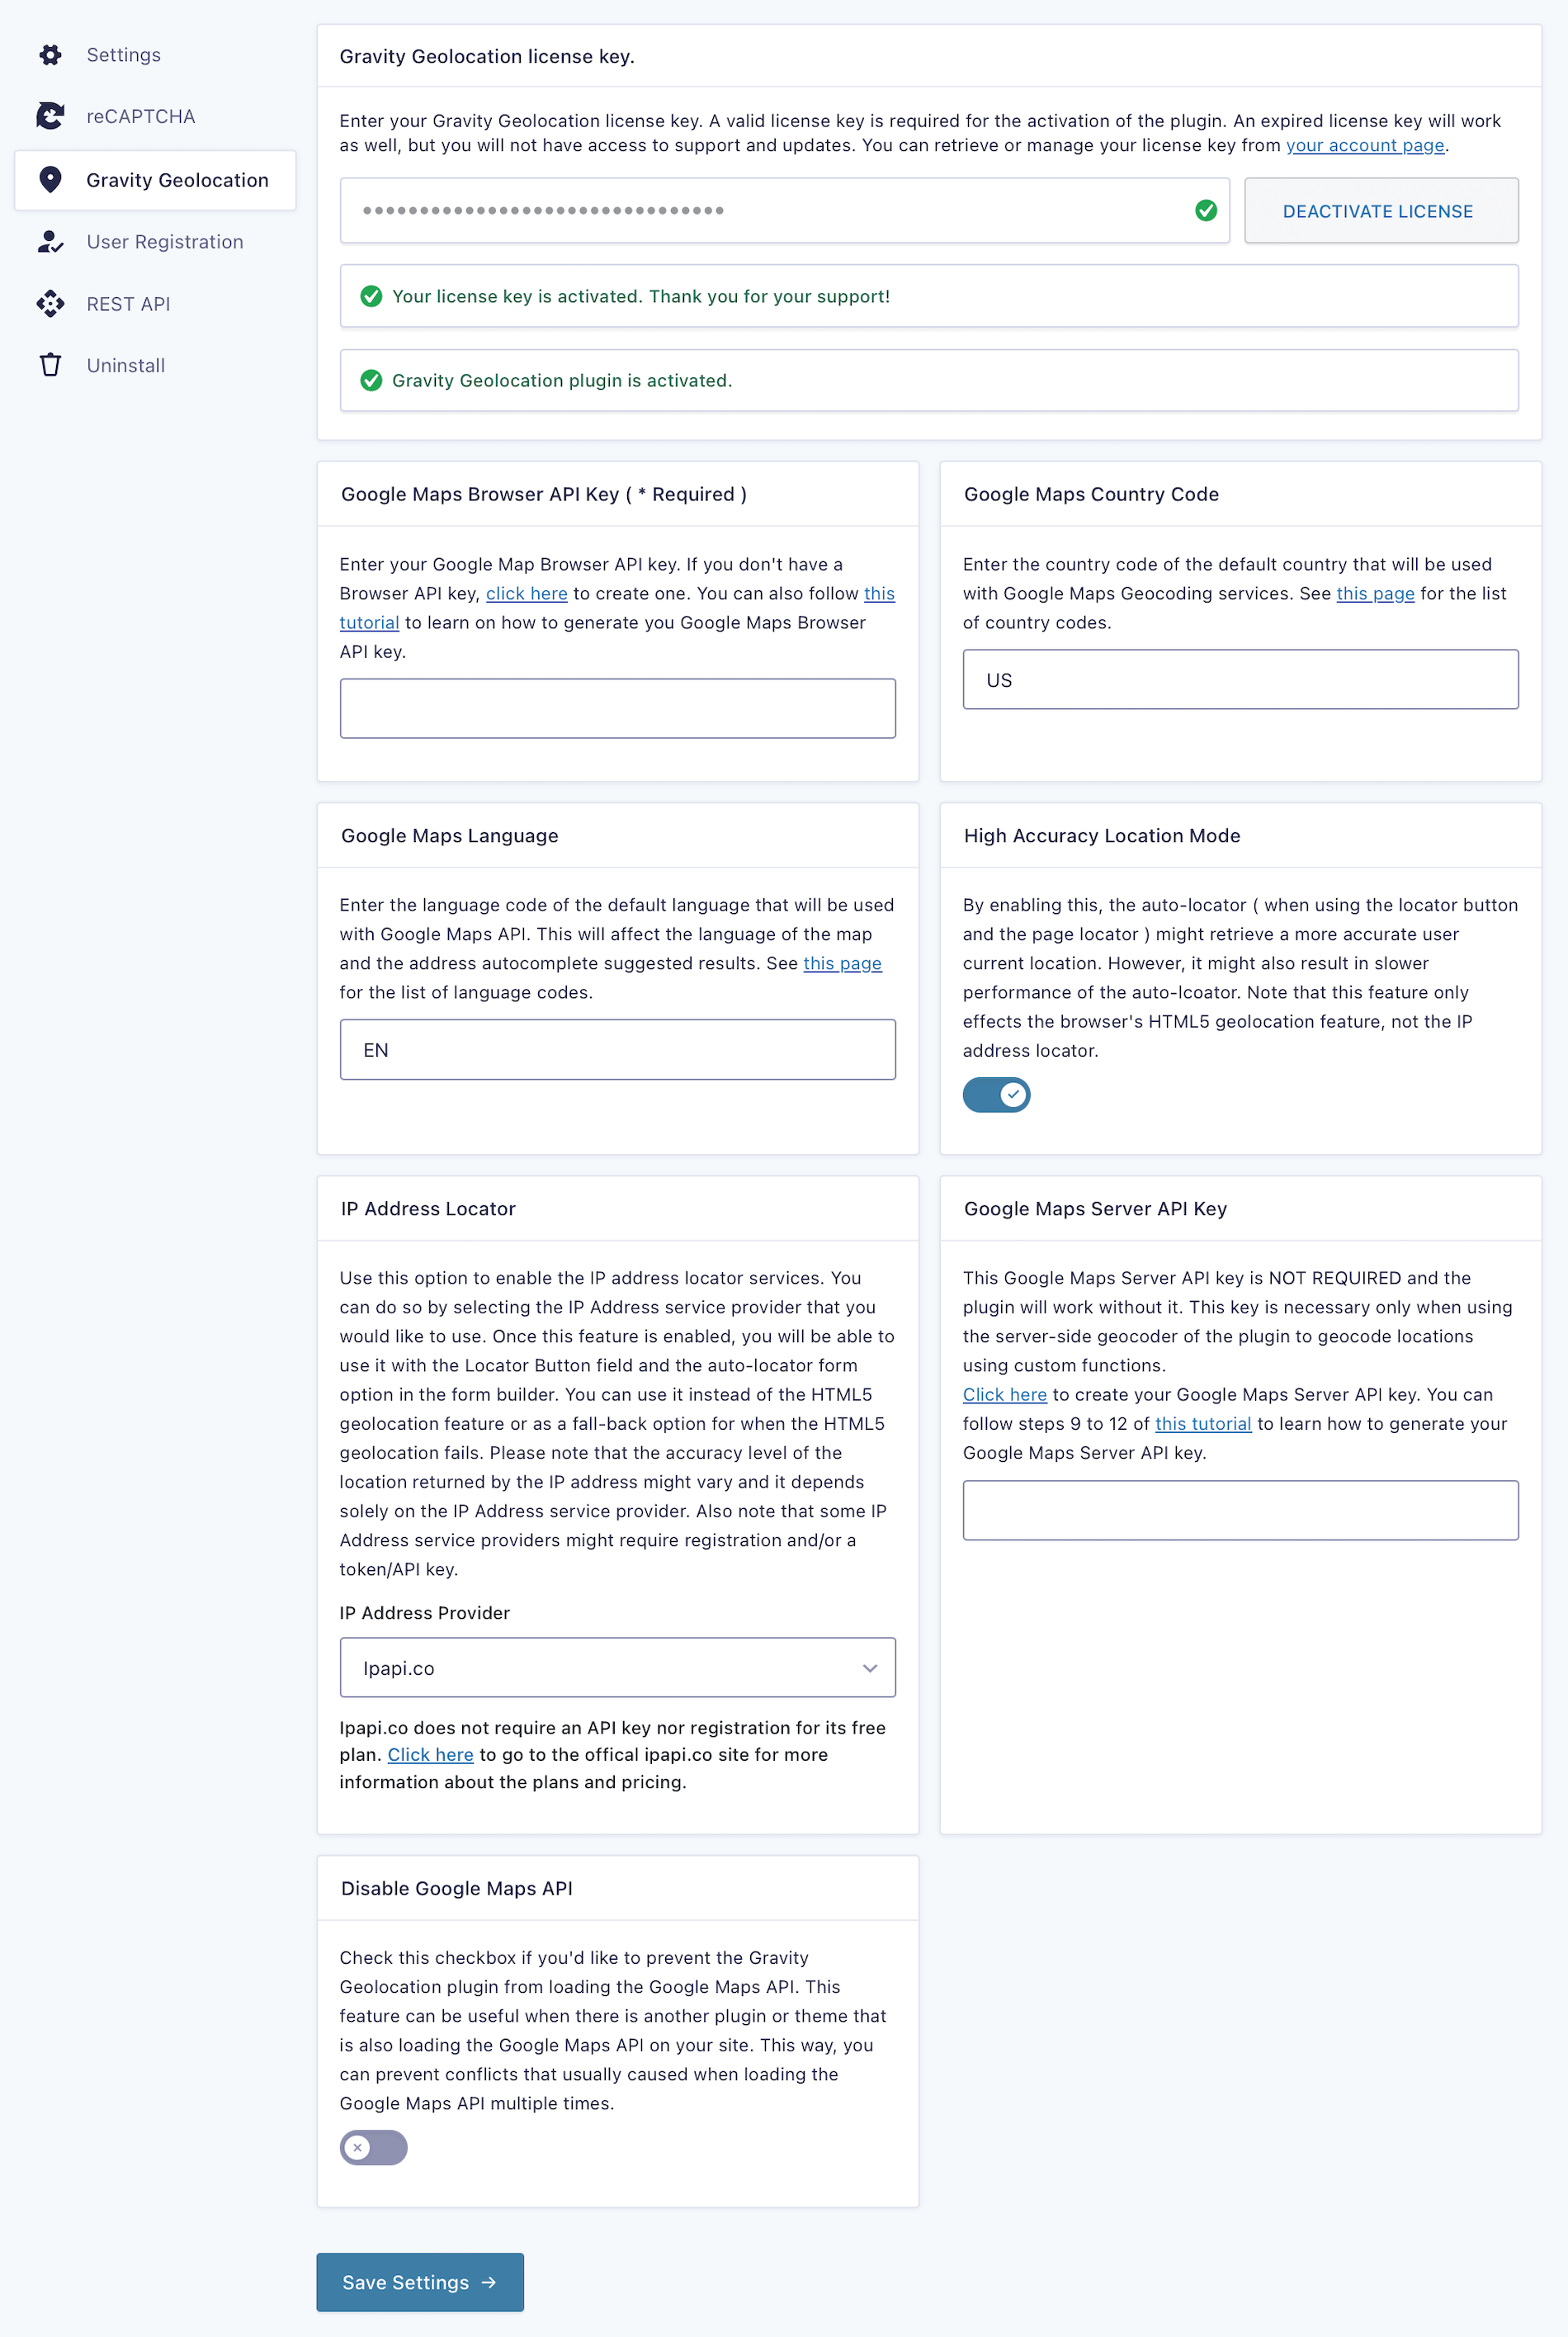
The Gravity Geolocation settings page contains the site-wide options used by the plugin. This is where you activate your license, add the Google Maps API keys, choose localization and IP-location options, and control how Google Maps and map markers load.
Complete these settings before building location-enabled Gravity Forms. Individual forms and fields have their own settings, but they rely on this global configuration.
Open the Settings Page
Sign in to the WordPress dashboard.
Go to Forms > Settings.
Select Gravity Geolocation.
Gravity Geolocation Settings page for Gravity Forms.
Gravity Geolocation Settings
1. Gravity Geolocation License Status
Use this panel to enter and activate your Gravity Geolocation license key and review its current status. An active license provides plugin updates and support. You can retrieve or manage your license from your account page.
2. Google Maps Browser API Key
Enter the Browser API Key (Required). Gravity Geolocation uses this key for client-side features such as Google Maps rendering, address autocomplete, map interactions, and markers. Restrict this key to your website domains and the browser-facing APIs used by the plugin.
Enter the Server API Key (Required). The plugin uses it for secure server-side requests, including geocoding, reverse geocoding, directions, and route-distance calculations. Keep this key private and restrict it to the public IP address or addresses used for outbound requests by your web server.
If your host uses changing outbound IP addresses, ask the host which restriction method is supported before applying an IP restriction.
4. Google Maps Country Code
Enter the default country or region code used by Google Maps geocoding services. This can improve regional results and address suggestions. The default value is US. See Google’s Maps Platform coverage details for supported regions.
5. Google Maps Language
Enter the language code used for Google Maps controls, labels, and address autocomplete suggestions. The default value is en. See Google’s supported languages.
6. IP Address Locator
Select an IP address provider if you want the Locator Button or a form’s auto-locator to use IP-based location detection. IP location can be used instead of browser geolocation or as a fallback when browser geolocation fails.
The available choices are Disable, Ipapi.co, ipinfo.io, Ipregistry, and MaxMind. Accuracy and account requirements are controlled by the selected provider:
Ipapi.co: Its free plan does not require a plugin token; other plans and usage limits are set by the provider.
MaxMind: Uses MaxMind’s client-side GeoIP service when selected.
Note: IP geolocation is generally less precise than browser-based geolocation and depends on the provider’s data.
7. High Accuracy Location Mode
Enable this option to let browser-based auto-location request a potentially more accurate current position. This may take longer or use more device resources. It affects only the browser’s HTML5 geolocation feature, not IP-based location detection.
8. Disable Google Maps API
Enable this option only when another plugin or your theme already loads the Google Maps JavaScript API on every page where a Gravity Geolocation form appears. This can prevent conflicts caused by loading the API more than once.
Important: The other plugin or theme must load the correct Google Maps libraries and your Browser API key. Otherwise, map and address features may not work.
9. Disable Advanced Markers
Google Maps Advanced Markers are enabled by default and provide the plugin’s current marker rendering. Enable this setting to fall back to standard Google Maps markers when troubleshooting compatibility or when your configuration requires the older marker type.
Note: Custom JSON map styles are not applied while Advanced Markers are active. If your map depends on JSON styling, disable Advanced Markers or use a Google Cloud Map ID and cloud-based map styling.
Save and Test the Settings
Complete the required license and API key fields.
Choose the localization, IP-location, and advanced options your site needs.
Click Save Settings.
Open a form that contains a Geocoder field and test its map, autocomplete, and location features on the front end.
If an API feature does not work, confirm that billing is enabled in Google Cloud, the required API is enabled, and the correct restriction is applied to each key.